Baked Chicken Tacos
Tacos are a weeknight favorite, but the usual stovetop routine means a skillet of filling, a stack of warm tortillas, and a lot of juggling. Baked chicken tacos fix that. You fill the shells, stand them upright in a baking dish, and let the oven do the work. The edges of the tortillas turn crisp, the cheese melts into the filling, and everyone gets a taco that holds together from the first bite to the last.
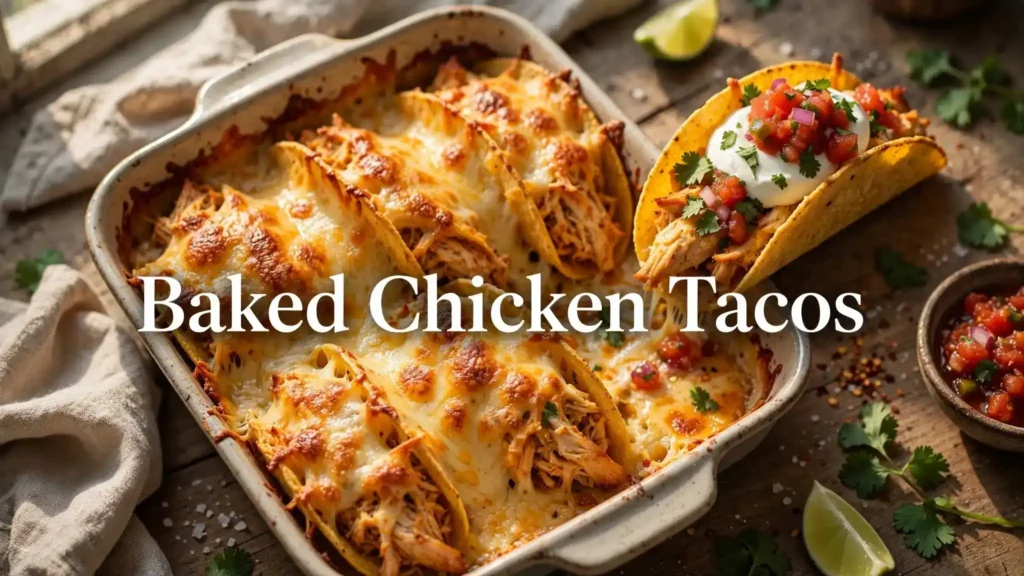
This guide gives you the full recipe, a step-by-step method for baking tacos, tips for choosing the right chicken and shells, fixes for the most common problems, plenty of filling and topping ideas, make-ahead and storage advice, a nutrition overview, and a detailed FAQ.
Baked Chicken Tacos
Ingredients
Equipment
Method
- Preheat oven to 400°F (200°C). Grease a 9×13-inch baking dish.
- Poach chicken 15-18 minutes until 165°F (or use 3 cups shredded rotisserie).
- Shred chicken with two forks.
- Sauté onion 3-4 minutes; add garlic 30 seconds.
- Stir in chicken, taco seasoning, salsa, broth; simmer 5 minutes until thick. Fold in beans; add lime juice and salt.
- Warm shells 2-3 minutes.
- Fill each shell with cheese, 1/4 cup filling, more cheese.
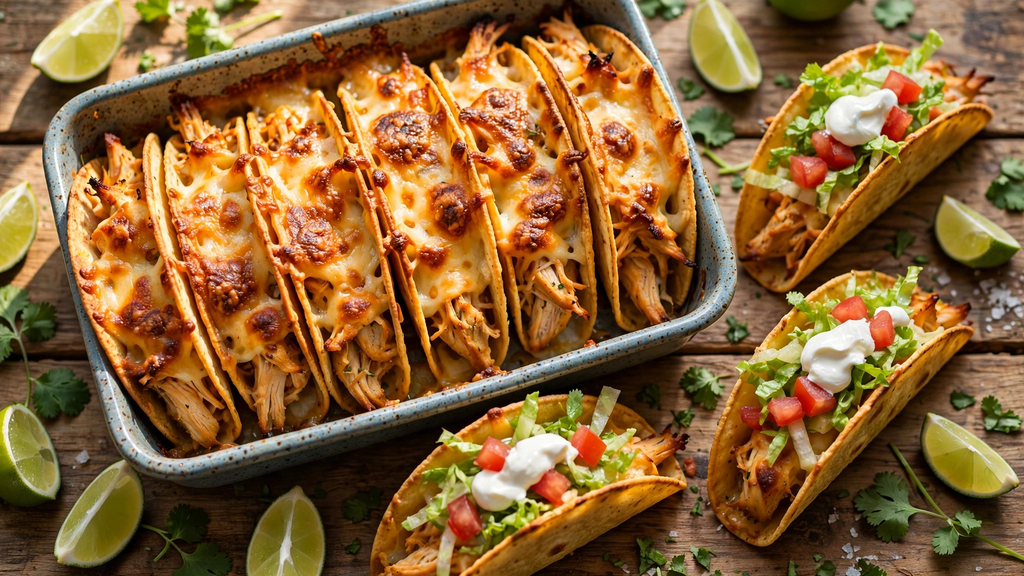
- Stand tacos upright in dish.
- Bake 8-10 minutes until cheese melts and shells crisp.
- Top with lettuce, tomato, avocado, sour cream, cilantro; serve with lime.
Notes
How To Bake Chicken Tacos
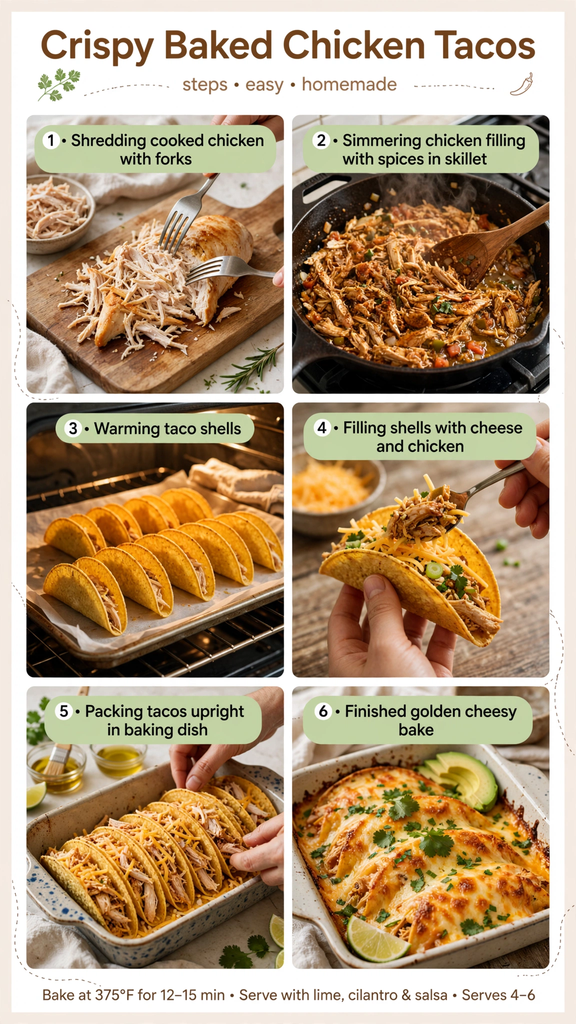
Here is the entire method in six rules, whether you use this recipe or your own filling.
- Cook and season the chicken first. Baking assembled tacos only melts the cheese and crisps the shell. It will not cook raw chicken through, so start with fully cooked chicken.
- Keep the filling thick. Reduce any sauce until the mixture holds together on a spoon.
- Warm the shells. Cold, brittle shells crack when filled. A few minutes in the oven makes them more flexible.
- Line cheese at the bottom. It seals the shell and helps hold the filling.
- Pack the tacos tightly. A snug dish keeps them upright. If you have fewer tacos, use a smaller dish or foil dividers.
- Bake hot and fast. 400°F for 8 to 10 minutes is enough to melt the cheese and crisp the shells without drying out the chicken.
Choosing the Best Chicken
Boneless, skinless chicken breasts. The classic choice. They are lean, shred easily, and absorb seasoning well. The risk is dryness, so don’t overcook them and keep the filling moist with salsa and broth.
Boneless, skinless chicken thighs. My favorite for juicy tacos. Thighs have more fat and flavor and stay tender even if you cook them a minute too long. They shred a little more coarsely, which gives great texture.
Rotisserie chicken. The fastest shortcut. Pull the meat from a store-bought rotisserie chicken, discard the skin, and shred. You need about 3 cups of meat. Because the bird is already seasoned, taste the filling before adding the full packet of taco seasoning.
Leftover chicken. Cooked leftover chicken from another meal works perfectly. Add a splash of broth when reheating it in the skillet so it doesn’t dry out.
Slow cooker or Instant Pot chicken. For a big batch, cook the chicken with salsa and seasoning for 3 to 4 hours on low in a slow cooker, or 10 minutes under pressure in an Instant Pot. Shred, drain off extra liquid, and use as the filling.
Ground chicken. Brown it in a skillet with the onion and seasoning, breaking it into small crumbles. It cooks quickly and needs no shredding.
Choosing Your Taco Shells
Hard corn shells (stand-and-stuff). These are the standard for baked tacos. The flat bottom on stand-and-stuff shells makes them especially easy to line up in a dish.
Standard U-shaped hard shells. Work just as well. Pack them tightly so they stay upright.
Small corn tortillas. For a softer, more authentic result, warm the tortillas, fill them, fold them, and bake them stacked on their sides. You can also brush them lightly with oil and bake them for a crisper edge. Corn tortillas also make these tacos naturally gluten-free.
Flour tortillas. Use soft flour tortillas to make folded, baked tacos with a chewy, golden finish. Brush with a little oil and bake for 10 to 12 minutes, turning once.
Mini taco shells. Great for parties. Use about 1 tablespoon of filling per mini shell and bake for 6 to 8 minutes.
Homemade Taco Seasoning
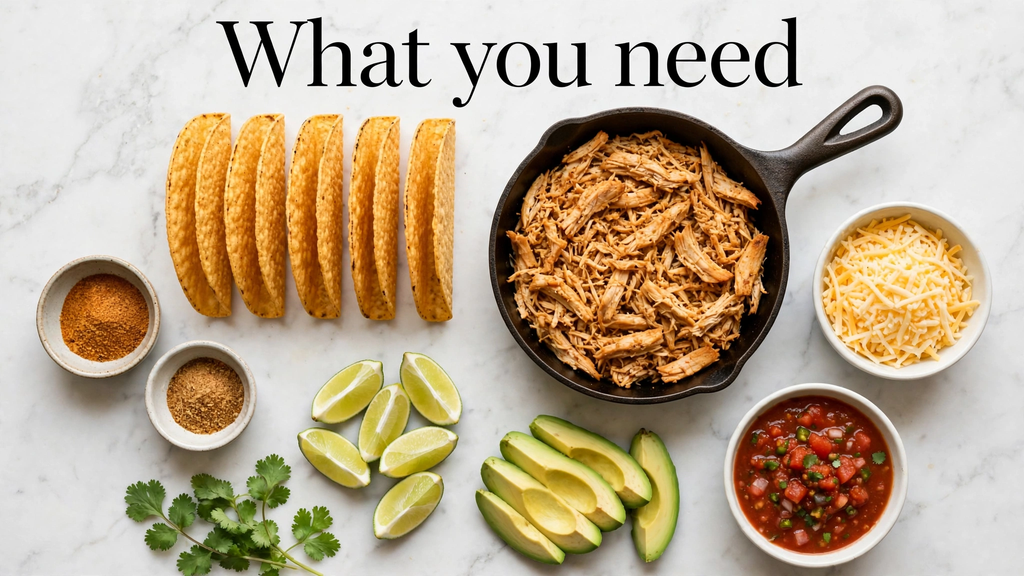
Store-bought packets are convenient, but a homemade blend is cheaper, lower in sodium, and easy to adjust. This amount equals about one packet.
- 1 tablespoon chili powder
- 1 teaspoon ground cumin
- 1 teaspoon smoked paprika
- ½ teaspoon garlic powder
- ½ teaspoon onion powder
- ½ teaspoon dried oregano
- ½ teaspoon salt
- ¼ teaspoon black pepper
- Pinch of cayenne (optional)
Make a larger batch and store it in a sealed jar for up to 6 months.
Step-by-Step Troubleshooting
Problem: The shells are soggy.
The filling was too wet, or the tacos baked too long. Simmer the filling until thick, drain beans well, and add cheese to the bottom of the shell.
Problem: The shells cracked when filling.
They were cold and brittle. Warm them in the oven first, and fill gently without overstuffing.
Problem: The tacos fell over in the dish.
The dish was too big. Use a snugger dish or fill empty spaces with foil, ramekins, or a rolled kitchen towel wrapped in foil.
Problem: The chicken is dry.
It was overcooked, or the filling didn’t have enough sauce. Cook breasts only to 165°F (74°C), use thighs for extra moisture, and add a splash of broth or salsa when reheating.
Problem: The cheese didn’t brown.
Bake for a minute or two longer, or broil at the end. A cheese blend with some cheddar browns better than mozzarella alone.
Problem: The edges burned.
Your oven runs hot, or the dish is too close to the top element. Use the middle rack and check at 7 minutes.
Problem: The tacos are bland.
Season the filling well, salt each layer, and finish with lime juice. Fresh toppings like cilantro, onion, and lime add brightness.
Filling and Flavor Variations
Cheesy ranch chicken tacos. Stir 2 tablespoons of ranch seasoning and ½ cup of cream cheese into the shredded chicken for a creamy, tangy filling.
Buffalo chicken tacos. Toss shredded chicken with ¼ cup of buffalo sauce and a tablespoon of melted butter. Use blue cheese or mozzarella and top with celery and a ranch drizzle.
BBQ chicken tacos. Mix the chicken with ½ cup of barbecue sauce, then top with cheddar, red onion, and chopped cilantro.
Chipotle chicken tacos. Add 1 to 2 chopped chipotle peppers in adobo sauce for smoky heat. Top with lime crema.
Green chile chicken tacos. Replace the red salsa with salsa verde and a small can of diced green chiles. Use Monterey Jack and finish with pickled onions.
Hawaiian chicken tacos. Mix in a few tablespoons of teriyaki sauce and ½ cup of diced pineapple. Top with mozzarella and sliced scallions.
Chicken fajita tacos. Sauté sliced bell peppers and onions with fajita seasoning and add them to the filling.
Taco-stuffed with rice and beans. Add ½ cup of cooked rice and a can of beans to stretch the filling and make it more filling for a crowd.
Vegetarian version. Replace the chicken with seasoned black beans, roasted sweet potato, or crumbled tofu.
Topping and Side Ideas
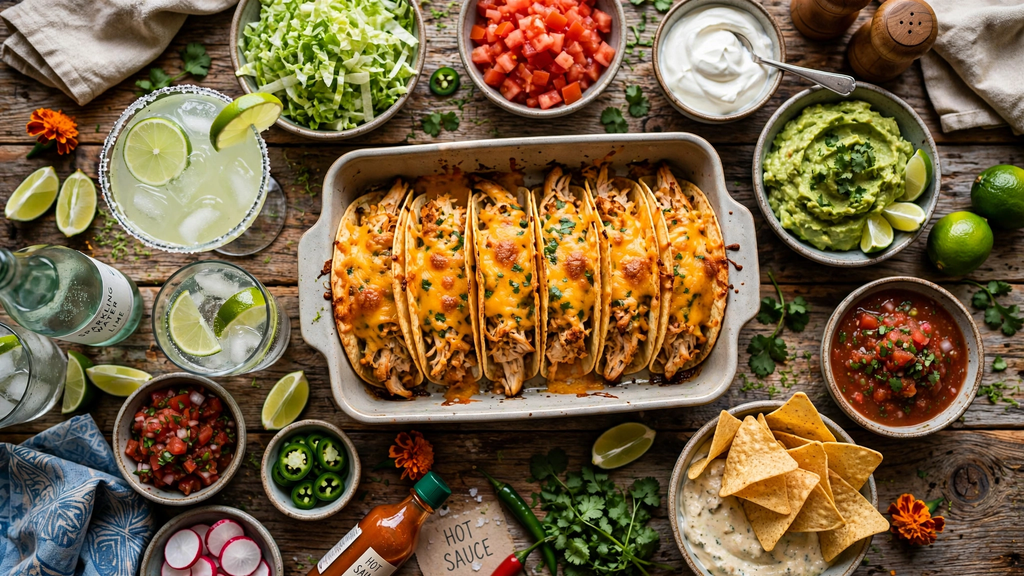
Toppings:
- Shredded lettuce or cabbage
- Diced tomato or pico de gallo
- Pickled red onions
- Sliced jalapeños
- Avocado, guacamole, or crema
- Sour cream or Greek yogurt
- Cotija or queso fresco
- Fresh cilantro and lime
Sides:
- Mexican rice or cilantro-lime rice
- Refried or black beans
- Elote (Mexican street corn) or a corn salad
- Chips with salsa and guacamole
- A crisp jicama or cabbage slaw
- Fresh fruit or a simple tomato and cucumber salad
Make-Ahead, Storage, and Reheating
Make ahead. Prepare the chicken filling up to 3 days in advance and refrigerate it in an airtight container. Reheat it in a skillet with a splash of broth before assembling. Assemble and bake the tacos right before serving so the shells stay crisp.
Refrigerating. Store leftover baked tacos in an airtight container for up to 3 days. For best results, keep the toppings separate.
Freezing. Freeze the cooked filling in freezer bags for up to 3 months. Thaw overnight in the refrigerator. Fully assembled, baked tacos don’t freeze well because the shells turn soggy.
Reheating. Bake leftover tacos at 350°F (175°C) for 8 to 10 minutes until warm and crisp. An air fryer at 350°F for 3 to 4 minutes works nicely too. Reheat the filling alone in a skillet if the shells have softened, and spoon it into fresh shells.
Feeding a crowd. Double the recipe and bake in two dishes, or use a sheet pan with foil dividers. Plan on 2 to 3 tacos per adult.
A Little Taco History
Tacos have been part of Mexican cuisine for centuries, traditionally served in soft corn tortillas with simple fillings. The crisp, U-shaped hard-shell taco became popular in the United States in the early 20th century and spread widely after the mid-1900s, helped by fast food chains and packaged kits. Baked tacos, where you stand the shells in a dish and bake them, are a modern home-cook adaptation, loved for being easy, shareable, and kid-friendly.
Nutrition Overview
Estimates per serving (2 tacos with filling and cheese, no toppings), based on a recipe serving 6 and made with chicken breasts and standard hard shells. Values vary with brands and ingredients.
| Nutrient | Approximate amount |
|---|---|
| Calories | 390 kcal |
| Protein | 31 g |
| Carbohydrates | 28 g |
| Fat | 17 g |
| Saturated fat | 7 g |
| Fiber | 5 g |
| Sugar | 3 g |
| Sodium | 780 mg |
Protein. At roughly 30 grams per serving, this is a protein-rich meal that supports fullness and muscle maintenance.
Carbohydrates. The carbs come from the shells, beans, and salsa. The black beans contribute much of the fiber.
Fat. The majority of the fat comes from the cheese and oil. Using reduced-fat cheese or less cheese lowers the total.
Sodium. Taco seasoning packets, salsa, and cheese can add up. Make your own seasoning, choose low-sodium broth and canned beans, and rinse the beans to cut sodium.
Easy ways to lighten it:
- Use chicken breast and reduced-fat cheese
- Swap sour cream for plain Greek yogurt
- Use small corn tortillas instead of hard shells
- Load up on lettuce, tomatoes, and cabbage for volume
- Skip the oil and sauté the onion in a splash of broth
Easy ways to boost it: add extra beans or corn, top with avocado for healthy fats, and serve with a vegetable-based side.
This overview is a general estimate and not medical advice. If you’re managing a health condition or following a specific diet, use a nutrition calculator with your exact ingredients or consult a registered dietitian.
Frequently Asked Questions
About 8 to 10 minutes at 400°F (200°C), once the chicken filling is already cooked. You are only melting the cheese and crisping the shells.
Yes. The short bake won’t cook raw chicken safely. Cook, shred, and season the chicken first.
No. For food safety, always use fully cooked chicken, which should reach 165°F (74°C) before it goes into the shells.
Warm them in the oven for a few minutes, handle them gently, and don’t overfill.
Pack them tightly in a 9×13-inch dish. If there are gaps, use foil balls, ramekins, or a muffin tin.
Yes. Fill the tortillas, fold them, and bake them in a greased dish, brushing the tops lightly with oil. They come out softer and chewier than hard shells.
Absolutely. It is the fastest option. Use about 3 cups of shredded meat and adjust the seasoning to taste.
A Mexican blend, cheddar, Monterey Jack, or pepper jack all melt well. Shred your own cheese when you can, because pre-shredded cheese contains anti-caking agents that can make it melt less smoothly.
Yes, up to 3 days ahead in the refrigerator, or up to 3 months in the freezer.
Final Thoughts
Baked chicken tacos turn a busy weeknight into something a little more fun. Cook the chicken, keep the filling thick, warm the shells, pack the dish snugly, and let the oven melt and crisp everything together. Add your favorite toppings, set out the sides, and let everyone build their own plate. Once you try this method, you may never go back to filling tacos one at a time.